As usual, finding "true" parts for the SS180 in this day in age can be challenging. When installing my gas tank I accidently broke the tip of the fuel rod (gas on/off/reserve) switch -- Part #84424. The odd thing is the handle on the switch is plastic on my stock one, which doesn't make since to me because metal was used. So maybe my wife's SS180 had an aftermarket switch on it. Even finding an original used one is a bit challenging. I found one through a local rider, but he has to hunt it down and recommended I just buy a new one because I can count on that. At the time I thought metal ones were still available at a few shops.
I attempted to drill a small hole through the end of the fuel rod and re-use my original. It did not work, because the fuel rod needs to be able to dangle at a steep angle to allow you to install the gas tank and get the fuel rod through the frame. I won't post pictures of that. I was able to find an original Italian made all metal one, but note that the color is not true. The handle is not black. So it was a toss up for authenticity -- Italian, metal, and silver or reproduction, plastic, and black. I asked my wife what she wanted on her bike and she chose the metal Italian one. It won't look stock, but the bike is not a stock color either. And seeing as it is metal and Italian it is closer to the original. I hope to receive it by Monday in the mail.
Thursday, April 9, 2009
Sunday, April 5, 2009
SS180 & Rally180
Pictured above is a 1971 Vespa Rally 180 I found for sale on Scoot dot net. Note the similarities with the headset and tractor tail light on my wife's VSC. Clearly, the piston-ported engine in her bike is different than the rotary in the Rally 180, but frame wise they are close. I know that the Dept. of Motor Vehicles required the late USA models of the SS180 to have a round headset for weather-proofing. Not sure about the tractor tail light. And now that I have learned that I have a rear brake switch from the Rally180-200. There are some specific differences in the USA models that few Vespa owners know about. The question I now have, per my post just before this is . . .
Do both bikes share the same wiring loom? If not, I am in trouble.
Also, does any one know the breakdown of similarities / differences in detail on these two bikes?
Do both bikes share the same wiring loom? If not, I am in trouble.
Also, does any one know the breakdown of similarities / differences in detail on these two bikes?
Rear brake switch
With the help of David at First Kick Scooters, I have come to the realization that my stock rear brake switch was actually one from the Rally 180. It would be in grey with a grey gasket. You can see my stock one pictured here on the right. Note the guts of the stock one. It is in the "open" position, which means when you push the plunger that the connection is formed. SIP pictures their black Rally 180-200 here and you can see the internals are the same as my stock one. So now my big concern is, since I don't use a "Closed" GS/SS180 brake switch, should I have also used a Rally 180 wire loom (if they are different). Anybody know this answer?
Rotate rims & hubs correctly
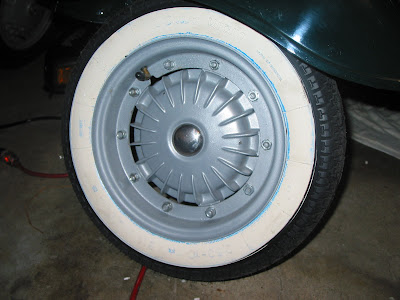
While the scoot lived in Ted's garage, he was kind enough to tackle a bit of the reassembly. One item he took care of for me was to purchase the new tubes and put the tires on the rim. I hadn't noticed until a reader pointed out, but the tube came through the rim wrong and the rims were connected to the hubs backwards.It was an easy change for me and just one more item that needed to be done. So I tackled the front tire a week ago and the rear tire today. An item worth investing in for me is a torque wrench -- a nice Craftsman for $90. I purchased mine on sale at Harbor Freight for $12 or $20 or something like that. I figured since it is a hand tool I should be safe. I was wrong. I just pulled it out and I can't remember, but I am not sure the last time I used it if I put it on the lowest setting so to preserve the intricate mechanisms. All I know is it no longer works and I now need to invest in a quality one.
I did not fix the spare tire set up yet, as the tube inside it was pinched between the rim halves when put together (make sure to pump up with air before sealing the halves) and I figure I will fix that when I put a new tube in. No rush as the visible tires are now correct.
Subscribe to:
Posts (Atom)