 Before I could install the new fuel rod I needed to pinch the connection tabs.
You can see the gap here. There is plenty of metal, and Gene M of Scooters O believed it would be safe enough to bend the metal.
 I put the pin in place and cushioned the metal tabs with an old sock.
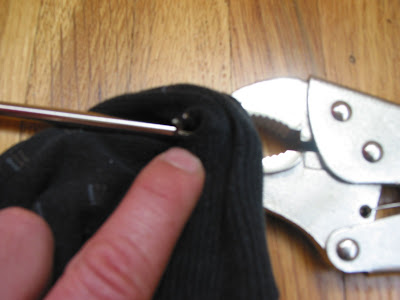 And pinched away. I was able to fairly easily and with good control.
 Unfortunately, both tabs did not bend. Only one did. I decided not to fuss with it, because the gap is closed and now locked around the clip and it will function correctly.
 Since the bike has been stored I had a bit of oil in there to protect the tank from rust. I used a little gasoline and flushed it all out. When I turned the fuel rod lever nothing happened. I removed the switch on the fuel valve and all look good. I put it back together and turned it with a screw driver an off an on the fuel work. The problem was the lever on the fuel rod. It is held on by tension and spins around the rod. I will use blue Locktite or JB Weld or Epoxy to lock it in place. I just need to determine what product is best.
 I put the pin in place and cushioned the metal tabs with an old sock.
 And pinched away. I was able to fairly easily and with good control.
 Unfortunately, both tabs did not bend. Only one did. I decided not to fuss with it, because the gap is closed and now locked around the clip and it will function correctly.
 Since the bike has been stored I had a bit of oil in there to protect the tank from rust. I used a little gasoline and flushed it all out. When I turned the fuel rod lever nothing happened. I removed the switch on the fuel valve and all look good. I put it back together and turned it with a screw driver an off an on the fuel work. The problem was the lever on the fuel rod. It is held on by tension and spins around the rod. I will use blue Locktite or JB Weld or Epoxy to lock it in place. I just need to determine what product is best.
Fill the tank up with a little gas and tighten/loosen the two small screws on the petcock until the on/off lever can turn easily and gas does not leak. You will need to find this perfect balance before putting the gas tank back in your bike.
 The hardware for the gas tank and seat were pretty rusty. I could easily replace it, but I like the idea of a few hidden parts to show the past and soul of the bike. So I used some WD-40 and a wire brush and cleaned up the threads. I used gasoline on the tougher spots.
 Note the black tape holding that screw in place. The nut on the underside came loose. It's hard to work in there. I may Locktite the nut in place or replace it.
 To guide the fuel rod I use a long strand of black tape since the lever was off. Easy install. I still need to glue the lever on to the rod in the OFF POSITION and I will be good.
 The hardware for the gas tank and seat were pretty rusty. I could easily replace it, but I like the idea of a few hidden parts to show the past and soul of the bike. So I used some WD-40 and a wire brush and cleaned up the threads. I used gasoline on the tougher spots.
 Note the black tape holding that screw in place. The nut on the underside came loose. It's hard to work in there. I may Locktite the nut in place or replace it.
 To guide the fuel rod I use a long strand of black tape since the lever was off. Easy install. I still need to glue the lever on to the rod in the OFF POSITION and I will be good.
Paul B. left a great note in the comment field. It is a good idea to install the fuel rod to frame cover (grommet) before sealing up the gas tank area as having access to both inside and outside the frame makes the job much much easier. I had to cut my circle back to get it to fit and at the last pinch to install the grommet cover it fell inside my frame. Of course! Murphy's Law. So I had to remove the seat and the gas tank to access it. Every time I move a painted item, no matter how careful I am, I run a high chance of a chip or a scratch. I believe that is also Murphy's Law.
Once I have the lever glued on I can fire her up.
Progress is being made.


