Monday, October 31, 2016

Clutch Issue *FINALLY* Resolved

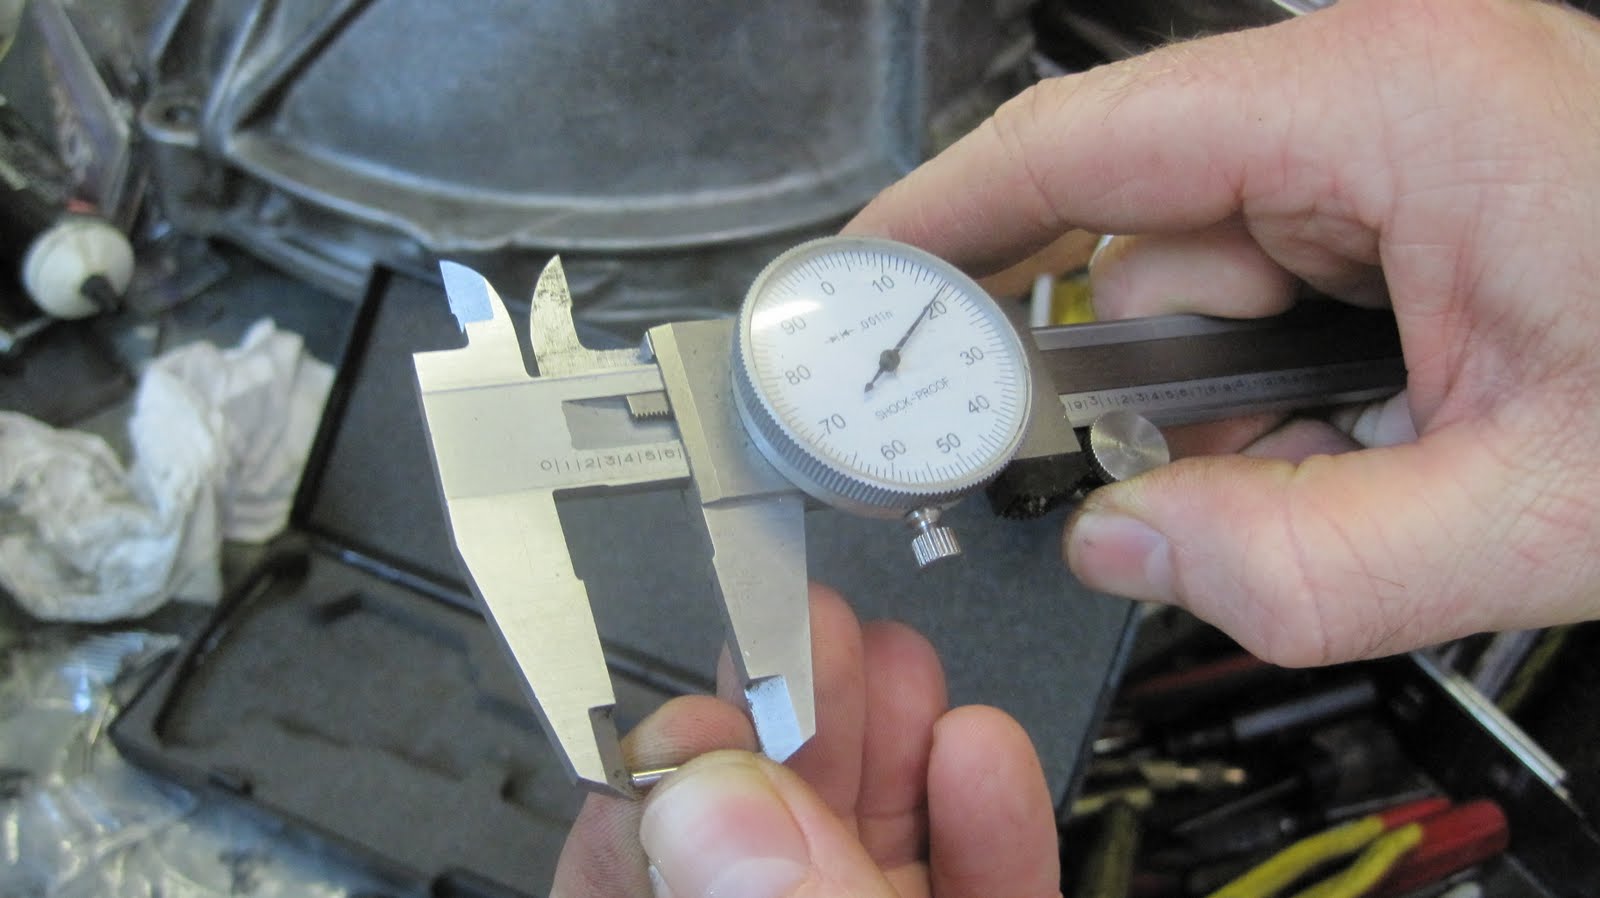
Well I bought a og repop Surflex basket long ago.  At first I bought a banded one, but the guts wouldn't fit in so I exchanged it for a stock one purchased at Hot Rod Scooter Parts, who bought out Scooter Parts Direct when they closed.  Cleaned it up with a wire brush.  Had my buddy Derek G. bring it to his machinist friend who trimmed metal at thousandths of an inch to spec with a high-end commercial digital machine so the plates and the corks could move freely.


 As you can see the fit is perfect.

The holes between the stock backplate and repop Surflex basket line up way better than the original basket.

Remember this problem?  Yah, the grooves in the brass ring that concerned Tom G. a few years ago?


Joe Deason, of Bellomoto.com, explained the clutch grinding sound like this,  "Lots of tiny imperfections really!, I installed and pulled off that clutch and test ride it about a dozen times literally! 


But the right tolerances of the needle bearings and lapping the heavy grooves out of the brass locking ring really made the difference!, plus soaking the clutch plates in ATF and hand filing the "dog ears" on the upper clutch plate made this ss180 pull away from the dock like a Cruz ship! 

After all these years I am just so dang excited to have the grinding sound of the clutch resolved.  It looks like it was many little things combined together.

I haven't seen nor ridden the bike yet as Joe is still tackling an electrical issue on the front headlight for me.

Saturday, October 15, 2016

Off to the mechanic

Tired of saying I am going to get to this bike.  It's time to bite the bullet and hire someone to complete it.


I received a couple referrals to Joe Deason of Bella Moto to complete the work.  He was trained at First Kick (SF) back in the day.  He has worked on GS's and SS's and owns his own SS180.  The work will be done in SF so it's convenient.

The bike will be picked up on Monday and work will begin next week I hope.

Here is the note that went to Joe along with a small box of parts and the bike:

Joe,


If anything comes up outside this scope please let me know before proceeding; however I do want the final product to be a 100% correctly assembled bike and a dependable / reliable rider.  And a looker of course.


I know there are some “smalls” that need to be addressed, such as the headlight bezel.


History:


This bike is a ground up restoration.  All seals and bearings are brand new as is much of the bike.


Paul S. worked at length on the clutch issue, including multiple clutch rebuilds.  I have rebuilt clutch twice with all brand new parts.  The only difference today is I now have a Surflex repop clutch basket.  Derek G. had his machinist trim off hundredths of a inch to ensure no binding.  He did NOT line it up correctly with the two holes to match the basket to the clutch, but it appears to move freely.


Derek G. worked with Paul S. on trying to get the headlight to work, but to no avail.


Resource:
  • All work on the bike is meticulously logged here so if you wonder about if anything was done then Google the part and “VespaRestortation” and it will appear at the very top of the list.


Delivery:
  • Clutch & all parts & tools sealed in a Rubbermaid.  Parts removed for work to be begin.  Saves time.  Also, spare brand new parts are included too.
  • New Surflex clutch basket provided.  Machinist trimmed hundreths of inch for free movement of plates.


Biggest issues:
  • Grinding sound happens only between “neutral” & “first”
    • Clutch has been rebuilt with both new needle roller bearings and all new everything, including NOS springs for SS180.
    • Layshaft has been rebuilt twice with P200 kits
  • Timesert (not helicoil) needs to be inserted into oil plug threads
  • Electrical issue: headlight does  not run (Paul S. thinks it may be grounding off)


Possible Clutch Issues Per Tom Giordino:
  1. Crank taper may need to be filed at woodruff key score marks.
  2. Use very fine lapping compound to smooth out with clutch and crank.
  3. Selector need to be replaced? (Though there is a new Italian repop)
  4. Possible bur on crank?
  5. Measure between wings/? (can’t make out my notes) of cracks in case of bind.  Time off due to assembly.
  6. Crank off at pin.
  7. Repop crux off and hitting
  8. Search for issues at 1st gear only as that is where the problem is.


Recent History:
Please complete and or/verify the following.  Chris did a nuts to bolts (exterior) check of the entire bike and told me to address the following items:
(1) Flip the fuel cock lever 180 degrees so it is installed correctly, which is 12 Pm is "on" and 9 PM is "reserve".
(2) The choke is sticking, which indicates the "R" clip on the inside of the frame is missing or is loose. Address that at the same time as the fuel cock lever.
(3) The air filter gasket is missing.  Fixed.
(4) The drain tube is missing from the air filter.
(5) Replace the air box lid seal (seal will NOT fit.  Run without). Done by Jeremy.
(6) Add split washers to the gas tank and seat nuts.
(7) Oil dripping from rear hub area. Check the rear hub seal. Brake pads may be soaked in oil. Chris B. tested the brakes after adjusting cable and riding and the brake pads are not soaked in oil.
(8) Add a washer or two to seat pivot screw (which locks the seat) so it is tall enough to click and lock.
(9) Install taller seat buffers so seat frame does not scratch paint on frame anymore.  P200 ones too short.  I provided new taller ones.
(10) Too much free play for clutch lever. Should be approx. 10 mm.Chris B. and I fixed that already.
(11) Too much free play for rear brake and the adjustment cable extension is installed incorrectly. The loose nut needs to face outward for access. Chris B. and I fixed that already.
(12) Too much free play for front brake and the adjustment cable extension is installed incorrectly. The loose nut needs to face outward for access. Chris B. and I fixed that already.
(13) Tighten kick start lever bolt down hard to avoid any free play on shaft. Chris B. and I fixed already.
(14) The clutch cable is too loose so that even before the lever is released the gears are engaged and the bike moves forward. Chris B. and I fixed already.
(15) Check the nut/bolt on seat bracket that is not tight.
(16) Forgo adding the airbox seal as it made the hole too large for the bellow and ripped it and hence I had to replace it with a 2nd one.  Is there another way?
(17) Drill small holes in gear selector box top to allow cables to not be cut too short to work on.  Or is there a better way.
(18) Locate a seat tail and add to seat to make seat look proper like a SS180 and not a P200.


* Please look over entire for any issues at all.  My goal is to have everything caught and fixed. I always hoped this bike might win a ribbon.  I want the parts you add on the bike all period correct. *

Monday, October 10, 2016

New Surflex Clutch Basket

I hit the NOS Surflex clutch basket with a wire brush and my Dremel to remove the light surface rust of age. It cleaned up really nicely.


However, there was some small binding when the clutch backplate did not come up 100% perfectly even.


So the basket will require a little work.  I bought this basket in 2014.

Sunday, March 16, 2014

Clutch update

In June 2013 I ordered the Surflex VSC clutch from SIP.  It is still out of stock.  I am tired of waiting and therefore I have begun to look for replacement parts and build up a new clutch.  I already have brand new needle roller bearings, NOS springs, corks, and plates.  I will try to replace the basket first.  If that doesn't work then the backplate and cog.

I reached out to folks to see if anyone in the SF Bay Area would allow me to bring my bike over to them and install and test their clutch in their drive way.  I don't need to get out of first gear to test it.  But understandably, no one said yes.

I will keep you updated.

Tuesday, July 23, 2013

Vespa SS180 Engine Re-rebuild

After a full restoration to my wife's SS180 we heard a weird grinding sound between neutral and 1st gear.  So we rebuilt the clutch - twice.  That didn't solve it.  So I opened the engine cases and rebuilt the layshaft.  I sealed the cases back up, but still the grinding sound exists.  Bummer.  Maybe we need a new clutch from SIP.  If I give throttle when the clutch is almost all there way out there is no grinding sound.  At this point, I will continue to trouble shoot, but I am prepared to live with the odd sound if necessary now.


Last summer I put the engine back together.  It was a learning curve.  I hit some rough spots, but figured it all out.

Yesterday, I spent the entire day with the bike and now she is back one the road.

Just a few odds and ends left.

SS180 is back on the road

After a full restoration to my wife's SS180 we heard a weird grinding sound between neutral and 1st gear.  So we rebuilt the clutch - twice.  That didn't solve it.  So I opened the engine cases and rebuilt the layshaft.  I sealed the cases back up, but still the grinding sound exists.  Bummer.  Maybe we need a new clutch from SIP.  If I give throttle when the clutch is almost all there way out there is no grinding sound.  At this point, I will continue to trouble shoot, but I am prepared to live with the odd sound if necessary now.

http://www.youtube.com/watch?v=Xsq8vJo6eHY&feature=youtu.be

Last summer I put the engine back together.  It was a learning curve.  I hit some rough spots, but figured it all out.

Yesterday, I spent the entire day with the bike and now she is back one the road.

Just a few odds and ends left.


Wednesday, August 8, 2012

Sneak Peak

Progress on the scooter has been made, but not on the blog.  I will post everything once I am complete. I have almost given up twice now on this soft engine rebuild.  I have learned along the way.  There's only thing I would re-do, soldering of stator, but that can be accessed easily in the future if ever need be.  80% of my time has gone to cleaning and only then on sealing the cases.  Almost done with this side.  Rear hub and clutch next.

Wednesday, April 11, 2012

Down for the count - injured

I am healing from a severe herniated disc at C6. My right arm was in a pain I can not describe. I was out of work for almost 2 weeks and could not get out of bed. This happened about 1.5 months ago. It's serious. It has the possibility of ending my riding career permanently.

Today was my second round of cortisone. The Sunday before last I reached for Piper, who ducked, and I over extended myself. My neck hurt through Wednesday. but seemed to heal. I could not lay any way other than on my back, but have been back to normal since last Wednesday. Doctor said that is a promising sign, but he also said if this cortisone shot does not bring me to 100% recovery we need to discuss surgery. It should be noted he suspect this will work and I will recover without surgery. The last shot brought me back to 65-70% and peaked out. So I just need another push for the last 30%. Being vigilantly careful.

What I believe happened is . . . around December 20th I bought a new helmet. The shop guy fitted it for me. He grabbed the helmet from the front and told me to keep my head straight. He then applied pressure to turn it. I used a lot of neck strength to keep my head straight. For a solid week I ate Ibprofin like candy because my neck hurt a lot. I could not look over my shoulder. Then I healed, I thought. For about two weeks at night my right arm hurt a lot. Then the bomb dropped and the disc popped. I cried as my wife helped me get dress for work and left work early and reported to urgent care. The pain is unreal. The pain meds suck - clouded my existence - very very strong stuff.

Keep me in your prayers. I have two scooters to restore and one wanting to be ridden now.

Tuesday, January 17, 2012

Seals went bad on my back plate

Wow! I am frustrated. After cleaning my engine case gasket with a razor blade and brake cleaner (thx Tom G.) I found that my seals on my backplate had hardened and broken. I was shocked!
The seals I need are 93990 (qty: 2) and 93977 (qty: 1).
I spoke with Gene M. and it is difficult to find these seals he has told me. An alternative is to run P-Series seals, but the hole sizes are different and don't seal as well. It's been many months since I took the backplate off, but the seals were new when the engine was rebuilt years ago by Christopher M. I don't know if the seals he used were VSC or VSE. Bummed. So bummed. Going to hunt them down now if I can.

I spoke with Tom G. about options:

" They are just brake backing plate dust seals.

They are extremely hard to find, and for a while were completely out of production. I'd say there is a good chance that Chris M. did not replace them, because he probably could not get them at the time.

If you can get them from 25 bucks, thats probably the best deal you're going to find.

Not replacing them will have no effect on the way your motor runs, and will not cause oil leaks. The cracks and deterioration will just let water and dust into your brake area, and may cause the brakes to slip a bit, or may cause premature deterioration of the pads. Which means you may have to perform brake maintenance more often (cleaning mostly). So replace them if you can, but don't let it hand you up. They won't affect running, and you can always try to find them cheaper if you want (I would just pay the 25 bucks). and go back in and install them later, which is not difficult to do. It aint original, but you can also cut some custom rings out of sheet neoprene and use them in place of the P-type O-rings. But frankly, I think P-type O rings will seal fine on the two small holes, and may just not seal so good on the one larger hole."

I have ordered a set of dust seals that are repops for the GS/SS.

Saturday, January 14, 2012

Layshaft Rebuild

No normal restoration takes this long. I have made many major changes throughout the process and therefore, well you know . . .

Before I can move forward I need to rebuild the layshaft. Thanks to Derek, who helped me with his mill and expertise. I rebuilt it with him and used nut/bolts to hold it together, per Tom G.'s recommendation. Tom recommended creating a small whole in the punch nut to catch the head of the rivet. Thanks Derek for helping with that.

Today, I riveted it shut using a palm nail gun (I highly recommend buying the MINI palm nailer for additional control and better view of the area you are working on) again per Tom G.'s recommendation. It went well.

Next step is to put the engine back together, which I hope to do in spurts in early mornings and late nights after my kids are asleep.

Wednesday, September 28, 2011

Update for September

Quick update . . .

Life again has gotten the best of me . . . a new teaching job and a young family has me spread thin. No complaints though! As you know the clutch is 100% rebuilt. The layshaft (cush drive) is rebuilt and held together by hardware. I will remove one nut/bolt at a tie and replace with rivets. Once that is done I will put everything back together and test it again. If the problem is still there a new clutch it is.

In the meantime we have replaced our two Bajaj Chetaks, which I repaired and sold in July, with a new-to-me bone stock 1979 P200 with 82XX original miles on it.


I am quite smitten with it.

Thursday, August 11, 2011

Barry Gwin's Vespa Clutch Compressor Tool

I called First Kick Scooters yesterday to see if they had a clutch compressor tool in stock. They did not, but I was told they just use a bolt with washers and nuts to compress clutches that come in their shop.

Then I called SF Scooter Centre and they had them in stock for $20. I stopped by to pick one up as opposed to risking damaging mine without the correct tool and Barry said, make your own. Don't buy this $20 one. He usually sells his Home Depot version ones for $5, but was all out. He drew up his design and sent me on my way.

It costs me $2.25 to make and I tested it in Home Depot and it worked great. Here's what I bought:
- 1/2 inch wing nut
- two 1/2 inch washes
- 1/2x3 inch carriage bolt

The idea is the taper on the carriage bolt is similar to the taper in the clutch. I made sure that my carriage bolt easily and freely turned so it would not score my taper in my clutch. So I guess in theory this is just like using washers, nuts, and a bolt, because my taper is not fitting the sleeve perfectly. I quickly compress, remove the circlip, and release the pressure in case this design puts undue pressure on the clutch since it is not pulling from the sleeve. I do know it is not in contact with the brass ring nut as it sits on the lip above it.

I hit Ace Hardware up yesterday, but they did not have large enough carriage bolts, so I used washers, nuts and a bolt and it worked fine if you're in a jam.

Homemade tool for the brass nut on the clutch

Thanks to Derek G. who transformed a deep socket on a lathe into this beautiful tool for me.
Derek said "The tool came out perfect. There is a .001 interference fit, so you have to push it onto the brass nuts, which keeps it tight. "

Wednesday, August 10, 2011

Lessons learned from complete clutch rebuild

Not surprisingly, I learned that Tom G. was correct about why the needle bearings were binding. This evening I disassembled the clutch 100% (yet again) and with a few taps all of the oiled needle bearings fell out. Furthermore, they all we reinstalled very easily around the circumference of the race. There was no binding.
A couple things to note:
(1) The entire clutch was rebuilt when the engine was done. VSX parts were used with the exception of new needle bearings. I did not receive the original ones back from Christopher M. after the rebuild so I can not compare the sizes, but I do know I just bought 40 new ones from Scooters O and Gene M. successfully installed them in another SS180 that had a similar problem and now there is no grinding noise from the clutch.
(2) A trick for tightening the brass ring I learned from Tom G. is "Put backing plate down on wooden surface. Screw two sheetrock or other screws in place adjacent to the "ears of the backing plate. The screws keep the backing plate from turning. then you use the tool to unscrew the ring. Use just enough force to get the ring to turn. " I took another approach and used three small headless nails and lined them through both plates and turned the top plate so each locked against the nail and there was no movement. I then tightened the brass ring and could lift the clutch assembly off the wood base. Tom's idea may be smarter as it could be less stress on the two plates. I hadn't reread Tom's note and could not get my Sheetrock screws to fit the holes the nails did.
(3) For the brass ring there is no torque guide and it is unlikely to loosen since it is a reverse thread. I kept my hand directly above the socket (less torque) and tightened it down with one jab. Then I stopped. Brass is not that hard.
(4) What I did notice is that the NOS clutch springs (I point to the NOS ones in the slide show) I just purchased are noticeably taller than the VSX ones. Furthermore, they sit in the cups much more snugly. I wonder what difference, if any, that could cause. I did not receive the original ones back so I could not compare the difference in height or width.

The only question now is if the scoring wear on the bottom of the brass ring nut is acceptable or if it suggest that the needle bearings will eventually wear through enough for the brass ring to fail or to cause binding of the heads of the bearings at low RPMs -- hence the sound between neutral and first gear. I want to know this answer ASAP. Follow-up: spoke with Tom and he said that the ring has wear, but not truly scoring. He said their is nothing wrong with the brass ring as-is.

So . . .

At this point, I guess it makes sense to reassemble the bike and test it. If it works, wonderful! If it doesn't it's not hard to replace the clutch and I will need to buy a new one.

Tuesday, August 9, 2011

Will this clutch work or am I in need of a new one?

Tonight I went over to Derek G.'s house and worked on the cush drive and clutch. We have some concerns about the clutch which need to be answered before I proceed.

Concern #1: Note the ridges in the bottom of the brass nut. This suggests that the needle bearings have rubbed against the brass ring

Concern #2: When I removed the needle bearings many fell out with a gentle tap, but there is a corner where the bearings would not come out and would not roll smoothly, even when I pushed them. I really pushed hard on these bearings and there was no movement. It took some effort.

When staring straight on at the bearing entrance, you can see that the spacing is not equal around the circumference. This may or may not be the design of Vespa. I don't know. If you do know, please speak up. When I felt the inside of bearing house I could feel an area at the bottom and marginally against the wall that did not feel as smooth as the rest and I wondered if this could be causing the bearings to bind maybe. But when I bench tested it a long time ago I could see the bearings moving through the oil hole.

Concern #3: Another concern I had is that it appears that the needle bearings are too tall and the brass ring nut is resting against the heads of the needle bearings and NOT the clutch surface. If this is indeed true, that could be a big problem.

We did not have any machinist dye to test this theory, but that is a next step.

What we did do is to measure the original needle bearing length against the new needle bearing length and they are exactly the same. I wonder though, if my original needle bearings are indeed original. They look in way too good of shape for 10,000 miles on dirt farm roads. I don't remember seeing an invoice when the engine and clutch were rebuilt for needle bearings, but I could be wrong.
Does anyone know the exact length the needle bearing should be?

Follow-up August 10, 2011:
As a back up I found a used stock clutch for $200, which seems too high. I spoke with Steve at ScooterWest and he agreed.

I wrote my mentor Tom G. to give him an update and he recommends a new clutch:

Here is what I wrote:

What I do know is this (after speaking to Steve at ScooterWest):

(1) my brass ring is scored, likely from the bearings touching it.
The NOS ones are perfectly smooth on both sides.
I don't know if this is a problem.

(2) the needle bearings get jammed in one corner of the clutch and
will not come out unless I use a screw driver and push them hard
around the circumference of the race until they loosen up. I am
unable to put new need bearings into the race at the same area and
need to put them in and use a screw driver to move them around the
circumference until they are all installed. The head of the race is
not 100% even around. Some of it is tighter and does not allow the
needle bearings to be removed or installed. Maybe this is by design,
maybe it is not.

I do not know if this is a problem.

The potential concern here is there could be binding of the needle
bearings and maybe that is causing my grinding sound between neutral
and 1st gear *only* because of the lower RPMs.

I hear your advice and it makes sense to just finish putting
everything together and back into the bike.

Jeremy

Tom's response:

That's news to me.
If the needles are binding up, then I'd go with a completely new clutch, since you don't know where the problem is.
I would not buy a used clutch if you can afford a new one.
Either of the SIP ones look good to me. Slight preference for original type . .
Tom

Further thoughts:

Thx again Tom.

I did not disassemble the clutch before removing the needle bearings
this time. Corks and plates and springs were all in place.

Also, I forgot I needed to use the clutch removal tool and followed a
manual two screw driver approach and gave some mild pressure to the
clutch on two sides to free it a couple times and then remembered I
needed my clutch removal tool. So I guess it is possible that I bent
it and caused the binding, but then again the problem existed before I
removed the clutch.

I was able to remove the needed bearings with no effort in the past
and reinstall them with no effort when the clutch was disassembled
:

Could this cause a problem?

Or maybe this is not the problem and I just created a new one. I remember I had no problem reinstalling those needle bearings back in. I don't remember binding. I guess it doesn't matter now since there is binding.

Tom's response:

No way to tell if your prying caused the damage. I'd say unlikely, but conceivable. Also, there is NEVER any reason to remove the ring and needles without dismantling the clutch. That could EASILY have caused your binding problem. Take the clutch completely apart, then reassemble the needles and see if they bind.

Monday, August 8, 2011

New tools


I needed the air palm nailer that Tom G. recommended I buy. While at Harbor Freight I also picked up some other tools I knew I would need in the future. Note that Harbor Freight Tools are not quality tools and are not built to last, but rather if you have a few jobs that will require a limited amount of use over the years you'll be fine and won't beat the price. Non-mechanical tools will work out just fine for you in the long-run as well with more regular use. Copper brushes
for cleaning parts is a wise investment. The air gun impact wrench will be used ONLy for loosing super tight screws during disassembly.

I did see a $20 blue colored mini air palm nailer to use for riveting and I think that would be a smarter choice. It is easier to hold and maybe control. Something to think about.

I hope to tackle the cush drive (aka layshaft) and clutch tomorrow night.

Wednesday, August 3, 2011

Planning for the layshaft rebuild

I contacted my mentor Tom G. and I asked him if there is anything special I need to consider when riveting and rebuilding the layshaft (cush drive aka Christmas Tree). I do not have a proper work bench nor vice yet, so I will head over to Paul S.'s house to borrow his late next week. Here is Tom's response:

Rebuilding a layshaft is not technically complicated, but in practice is not exactly child's play. Aside from the obvious (put the plate with the bulge in it on the correct side), you need to keep the plates firmly seated against the primary and cluster gears. To do this, assemble the whole unit with machine screws and bolts, and then remove one bolt at a time, substituting the rivet. You have to mash the rivet heads flat and firmly to hold the plates in place firmly. There are rivet presses that do this very nicely (but I don't have one). It is possible to just mash with a hammer, but this requires alot of care. I use a modified pneumatic brad driver (I put a bolt in the brad driver slot where the nails usually go, and drill a small locating dimple in the bolt head. The rivet tail seats nicely in the dimple. Then you just puch down on the brad driver, which is pressure activated, and the tool delivers hundreds of hammer blows in seconds, firmly collapsing the rivet. Just an idea. Good luck, Tom

I plan to buy an Air Palm Nailer and modify it for driving rivets and a vice.

Tuesday, August 2, 2011

Layshaft Disassembly

Quite over due and finally . . . I am back to working on the VSC and getting that clutch grind sound solved. The two prospective culprits for the sound are the layshaft or the clutch. Therefore, I will rebuild both since the engine is open and they are both out.

Prior to this project, I got both my wife's and my Bajaj Chetaks running again and then sold via Craigslist. Both bikes had been sitting for quite a while. My wife's bike's flywheel rivets sheared off and I replaced the flywheel, while my bike required a lot more trouble shooting to determine the problem from rebuilding the carb to installing a new spark plug resistor cap and spark plug. You can read about those repairs here. Now we are looking to buy a Vespa P200 for my daily rider.

I also had my 1962 Lambretta TV175's front fender repaired. You can read about that here.

Furthermore, if you are or know a teacher in public education, like myself, then you know how it feels to interview mid-summer for work every summer, because the economy is crap.

The layshaft disassembly went well and at close inspection, without surprise, Christopher M. did a great job rebuilding it when he rebuilt the engine only 15 miles ago. I felt bad tearing it down, but better safe than sorry. I bought a layshaft rebuild kit I will install.

You will note that the top plate is warped looking. According to Gene M. the only way to avoid that is to have a machine that installs all the rivets at once at the same time for even distribution. The small warping does not hurt the function.


The only pain in the butt was removing the rivets once I got the top and bottom plates off. It required a lot of drilling and Dremel grinding and patience. I was stressed I would grind the "seat" where the plate rests or the lip the plate rests against and twice, by accident, I hit it extremely lightly. I wish I had the attachment for the circular blade for my Dremel. That would have been best I think. I rarely need it and it costs quite a bit for the limited use I would give it.

Tomorrow I hope to rebuild the layshaft with new parts. Christopher M. did install a sealed bearing into the layshaft and I will remove one seal so the oil can get in there the way Vespa intended it to. In the mean time I am soaking my new corks for the clutch.

Sunday, February 20, 2011

Gonna rebuild the clutch and cush drive

Here are the following parts I am ordering:

Part # / Description / Qty

**** Clutch ****

- 110633 / Clutch Springs / qty: 6 (uprated if available)

- Clutch steels and corks

- 18975 / Clutch Rollers (needle bearings) / qty: 40

- Tool to open the brass nut to replace needle bearings (no more screw
driver -- not safe to use to open)

Am I missing anything else for a full rebuild?

**** Cush Drive ****

77372 / Internal Spring / qty: 6

77373 / External Spring / qty: 6

S.5765 / Rivets / qty: 6

77371 / Internal Spring Retainer Plate / 1

77370 / Outer Ring Retainer Plate / 1

Am I missing anything else for a full rebuild? I have a brand new
bearing there.

**** Seals ****

Engine Gasket

Gear Selector Gasket

Rear hub seal

Tuesday, January 11, 2011

Cush drive is okay

Chris B. inspected the cush drive today and gave it a clean bill of health, because he said "it's already been rebuilt. See the rivets that's not the manufacturer and the little bit of warping on the plate between the rivets is normal on a rebuild". He also dismantled the gears from the axle and inspected how it all fit together and confirmed the gears were installed correctly and were not rubbing. Everything looked good. Crap! At that point Chris recommended installing a new or tester clutch even though my clutch looks just great.

When Chris inspected the clutch and again today when he inspected the cush drive he commented, "it looks brand new." That combined with a rebuilt cush drive prompted me to call Christopher Markley and ask him if he rebuilt it. He has rebuilt so many of these and could not remember. He told me to check the parts invoices he gave me to be sure.

So I found a Scooter Works invoice he ordered back on 7/2006 and among the many items ordered I found:

1 Comp Clutch Kit -- VSX Surflex (item #CK4)

6 Spring, Cush Drive Inner (item #77372)

1 Plate, Spring Gear, Inner VSX (item #77371)

1 Plate, Spring Gear Outer VSX (item #77370)

6 Rivet, Spring Gear Assembly (item #S 05765)

1 Bearing, Spring Gear VSB, VSC (item #S 07153)

1 Lock Washer, Spring Gear NOS VSB,VSC (item # 58636)

From Scooter Parts Direct I placed an order on 11/2006 that included:

6 Spring, Spring Gear Outer (item #78853)

It seems all items for the cush drive were ordered on my dollar. So I regret not checking my paperwork to verify before I cracked the cases.

Besides Chris being right that everything looks brand new, I am not exactly sure what this could mean. Maybe after market products resulted in this sound. Research time.

I will post detailed photos before I put her back together.

Suggestions?